Setting up REAPER for the first time can be challenging. With so many options and some unusual default settings, it might feel overwhelming or frustrating, especially for new users.
I’ve always said that REAPER is the most flexible DAW out there. However, this flexibility and power can make it so intimidating at first 🥲
So, I wanted to create this guide to show you exactly what I would change if I had to start REAPER from scratch. I also wanted to give you a few tips on how things work so you can start your REAPER journey in the best possible way! 🤩
By the way, all of these tips and more can be found in the free eBook “Perfect Setup”, which covers everything you need to know to setup REAPER the way you want!
Let’s start 🚀
ㅤ
📒 Table of content
Export & backup your whole REAPER setup
The proper way to save projects in REAPER
Remove dots at the top of selected items
Vertical and horizontal scrolling
Set default item timebase to “Time”
Disable automatic fade in / fade out
Disable loop and limit edge of items
1. Export & backup your whole REAPER setup
Before you set up anything, I highly recommend exporting your current REAPER settings, just in case you want to revert back to your original setup.
Luckily, REAPER makes exporting and importing every setting super simple! This is helpful for when you are moving to another computer, sharing specific settings with friends, or just backing up in case your computer breaks!
How to backup REAPER
- Go to Preferences > General > Select Export Configuration.

- Check all checkboxes, this will export everything, giving you an exact replica of your current REAPER when you import this file into another REAPER.

- After it's done exporting, you should end up with a single .ReaperConfigZip file. You can store this file somewhere safe, and use it to import your REAPER settings.
On top of backing up that file locally, I highly recommend uploading it to the cloud as well!
2. The proper way to save projects in REAPER
When you save a REAPER project, always do it in its own folder. REAPER will keep all the project's media in this folder.
A quick way to do this is when you pick File > Save As... just tick the box at the bottom that says Create project directory.

Checking Create project directory will make a folder with the same name as your project. All the sounds you record for this project will be kept in this folder.
3. Make REAPER start faster
By default, REAPER opens the last active project, that means that every time you open reaper, you have to wait for it to load your last session.
I much prefer REAPER to just open a new blank project so it loads way quicker and I can get started with whatever I need at the moment.
How to change REAPER start action
- Go to Preferences > General.
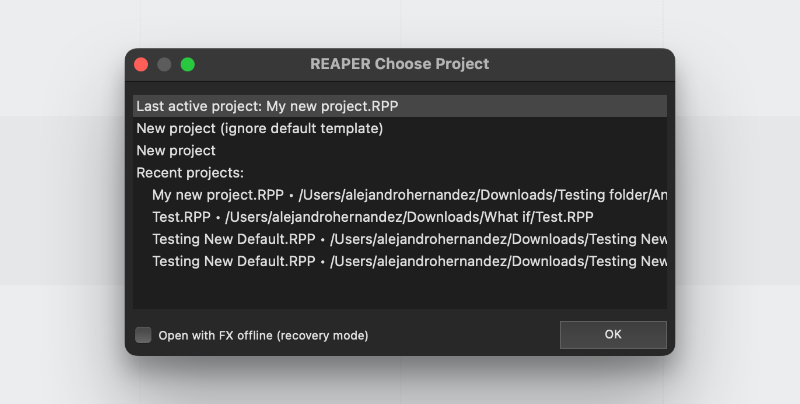
- Find Open projects on startup and select New project.

You can also set it to prompt if you prefer. This will show you a list of your most recent projects which is pretty cool too!
Bonus: Skip splash screen animation
Speaking of fast booting times, another thing that slightly helps start REAPER really quickly is disabling the little logo animation that happens every time you open REAPER.

It's honestly a very subtle difference, I think it just saves like 1 or 2 seconds, but I appreciate REAPER opening as quickly as possible.
How to skip splash screen animation
- Go to Preferences > General.
- Disable “Skip animation”.
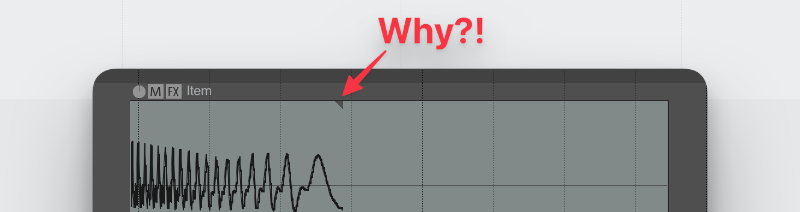
4. Remove dots at the top of selected items
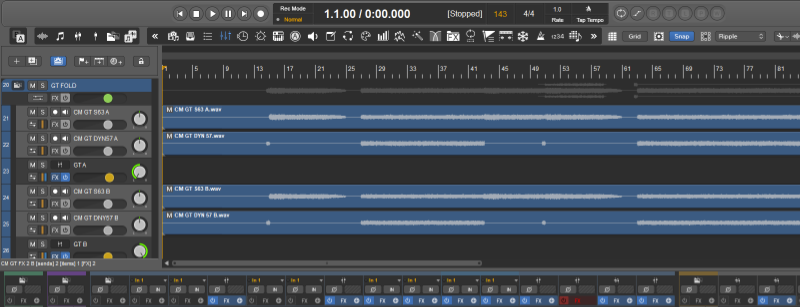
REAPER 7 introduced small indicators in the form of dots on top of the items you have selected. They look like this:
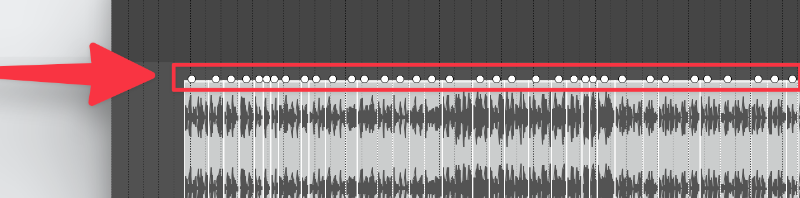
I am not a fan and I prefer to switch this off. I find that it gets clutter really easily. If you wish to turn this off, hereʼs how you do it.
How to remove item dot indicators in REAPER:
- Go to Preferences > Media.
- Disable Draw selection indicator on items.

5. Hand scrolling navigation
Once I discovered that you could hand scroll your way around REAPER, I couldn't go back. This is my favorite way to navigate around the Arrange View.
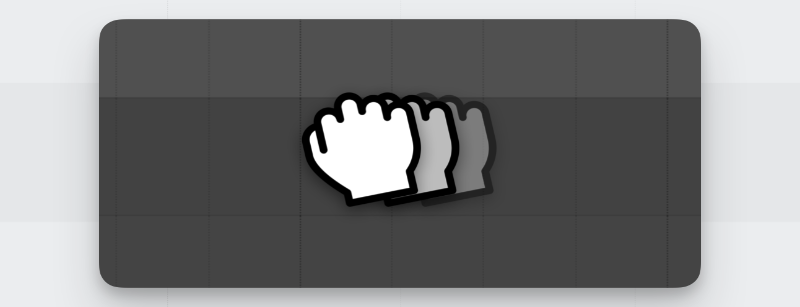
I like to set this to my middle mouse drag.
How to navigate around REAPER using a hand scroll:
- Go to Preferences > Mouse Modifiers.
- From the dropdown list, select Arrange View | Middle Drag.
- Double click the default action and select Hand scroll.

- Done! Now you should be able to click and drag with your mouse-wheel to navigate around the Arrange View.
6. Vertical and horizontal scrolling
Now, if you are not into hand scrolling, you may prefer the more traditional way of using your mouse wheel, which is for vertical and horizontal scrolling.
By default, REAPER will zoom in and out using your mouse wheel. And if you want to scroll, you have to hold Alt/Opt to scroll horizontally and hold Alt/Opt + Ctrl/Cmd to scroll vertically.
Now, I actually prefer this behavior because using hand scrolling takes care of both vertical and horizontal scrolling for me. And I like zooming in and out using my mouse wheel as demonstrated in the tip before.
However, if you prefer to change this behavior to scroll with your mouse wheel and zoom by holding a modifier, here's how to do it.
How to change vertical scroll shortcut in REAPER:
- Go to the Actions menu (Shortcut: ?) and search for “View: Scroll vertically (MIDI CC relative/mousewheel)”
- Click on Add... to set a shortcut, then press Special key. Drag using your mouse-wheel until it detects it. Press OK.

Now, you can do the same thing for Scroll horizontally.
How to change horizontal scroll shortcut in REAPER:
- In the Actions menu, search for “View: Scroll horizontally (MIDI CC relative/mousewheel)”
- Click on Add... to set a shortcut, then press Special key.
- Hold whatever modifier key you want for your zoom. I suggest Alt/Opt + Mouse-wheel. Press OK.
Done! You should now be able to scroll using your mouse wheel and zoom by using a modifier in combination with your mouse wheel.
7. Zoom towards your mouse
By default, you have to click and place the edit cursor wherever you want to zoom towards, and I think that's just unnecessary extra work.
I find it better to zoom towards my mouse cursor. It feels way more natural this way!
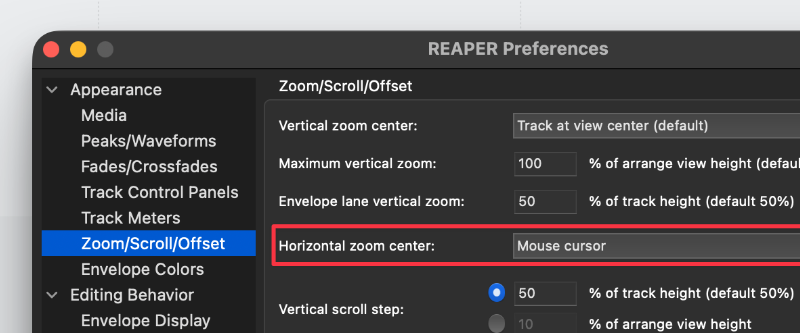
How to zoom towards your mouse in REAPER
- Go to Preferences > Zoom/Scroll/Offset.
- In Horizontal Zoom Center, select Mouse Cursor.
How to zoom tracks under your mouse in REAPER:
Also the same thing can be done with your track height. You can adjust the track height by holding Ctrl/Cmd + Mousewheel.
By default it will zoom towards the track in the center, but you can switch this to zoom towards the track under mouse.
To do so, in the same menu as before, change “Vertical zoom center:” to “track under mouse”.
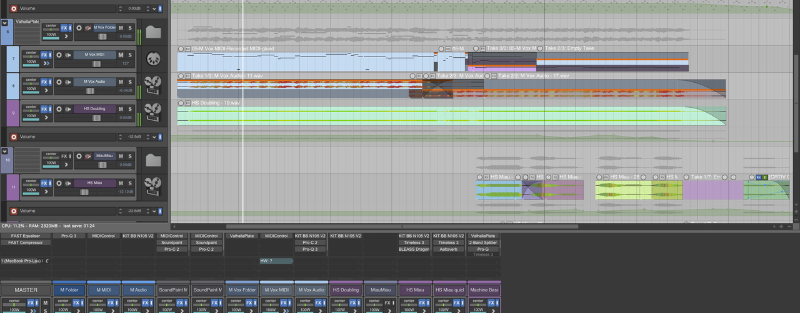
8. Try a different theme
Not happy with how REAPER looks? No worries, there are many themes that the community has made for you to try.
REAPER themes only change how the software looks without touching any of your settings. So, you can try any theme without any risk. You can always go back to the default theme easily.
You can find great themes on the REAPER stash or the REAPER forum. Here are some themes I quite enjoy! (Click on the name to get the link)
Reapertips Theme (This is what I use)

9. Adjust multiple fades at once
It is so weird to me that by default, REAPER wonʼt allow you to edit multiple fades when selecting multiple items. Luckily, itʼs an easy fix.

How to adjust multiple fades at once in REAPER:
- Go to Preferences > Mouse Modifiers
- Select context: Media Item fade/autocrossfade | Left drag
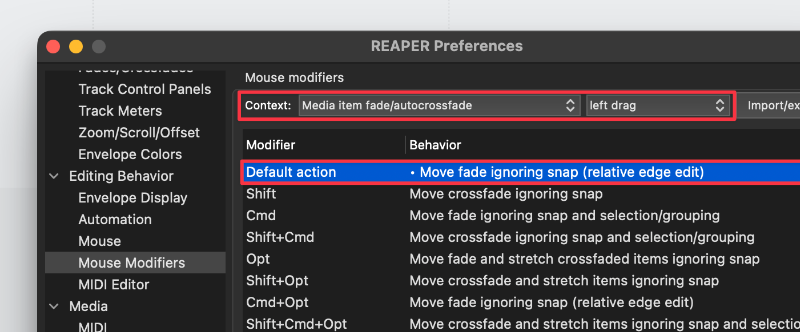
- Double click default action and select Move Fade > Relative edge edit
- Now you should be able to edit multiple fades at once!
10. Set default item timebase to “Time”
A lot of people get confused when they import an audio file into REAPER and change BPM, all of their files get stretched and pitched.
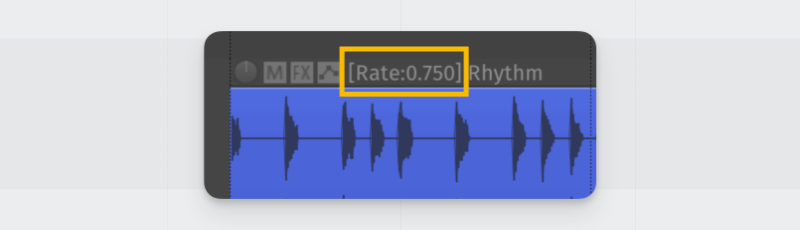
For more context check out this example case.
I like to set the default timebase to Time instead of Beats so that case above doesn't happen.
How to change the default item timebase in REAPER:
- Go to File > Project Settings....
- Where it says Timebase for items/envelopes/markers select Time.

- To save this as the default, click on Set as project default.
11. Disable automatic fade in / fade out
Alright, this is honestly a very strange default that I have never seen in any other audio editor ever. Every time you make a split in REAPER, it creates an automatic fade in and out that looks like this:
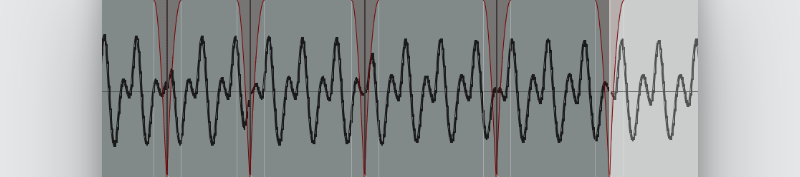
The intention with this is that it saves you from pops and clicks. And while it works, I find that it causes more trouble than it solves.
For example, if you split a snare right at the start, it will completely remove some of the attack and it's a very audible dip.
Another issue is that itʼs set to 10 ms and sometimes thatʼs too long or too short, so I have to adjust it anyway.
So I much prefer to disable this and just do the fades myself whenever I need them.
How to disable automatic fade-in / fade-out in REAPER:
- Go to Preferences > Item Fade Defaults
- Uncheck the boxes for fade-in/fade-out

- Done! Now you will be able to fine split items without worrying about fades getting in the way.
And if you ever need to apply auto-fades, thereʼs this handy SWS action that you can run called “Set item fades to default length”. This will use whatever length you have in your preferences. More info about SWS here.
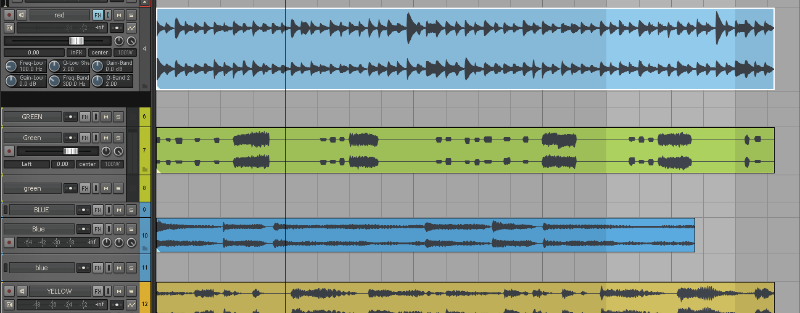
12. Disable loop and limit edge of items
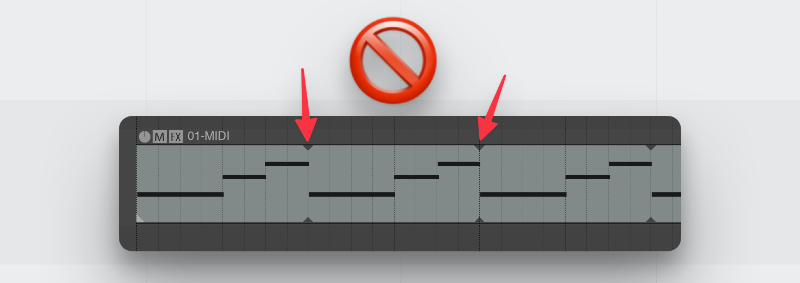
By default, when you drag the edge of an item, it will start looping instead of extending the item. Most people, including myself, find this odd and prefer to have always extend the item.
How to disable item loop in REAPER:
- Go to Preferences > Media Item Defaults
- Disable all these boxes (Loop source for...).
- Hit 'OK' and now you can extend MIDI items without worrying about loops.
Note: I came up with a pretty cool to toggle this by double clicking the edge of the item. Check it out here!
Now, thereʼs only one small problem...
Audio items don’t have a limit!
Disabling loop works great for MIDI items, as you can now extend them without worrying
about loops.
However, audio items just keep expanding beyond their limits, and I honestly donʼt see why I would want that.
Luckily, thereʼs an option to enable a hard limit for audio items when you are extending them, so they wonʼt go beyond their limit and will just snap at the edge.
How to enable limit edge of items in REAPER:
- Go to Preferences > Mouse Modifiers.
- In context, select Media Item Edge | Left drag.
- At the bottom of the window, enable Limit edits to source media
content for unlooped media items.
Now, when you extend items, you will have a hard limit at the item's edge.
There’s more!
As I mentioned earlier, these are all part of the free eBook you can grab called ‘Perfect Setup’

This eBook is filled with useful tips, illustrations, and easy-to-follow instructions for an amazing experience in setting up REAPER exactly how you want it.
Included are:
- Backup & Project Management
- How to properly save REAPER projects
- Different ways to Navigate REAPER
- Interface customization
- CPU & Latency troubleshooting
- Performance optimizations
- And more!
⭐ Grab it! → Reapertips - The Perfect Setup
Wish you the best in your REAPER journey, hopefully this collection of tips will smooth your experience ✨