When you're done with a project and ready to share it, you'll need to render it. That's REAPER's term for exporting audio.
To open the Render dialog, go to File > Render... or press Ctrl + Alt + R on Windows / Cmd + Alt + R on Mac.
The Render dialog has a lot of useful features, so in this article I'll cover the basics of exporting and then work up to the more advanced options.
🎛️ The basics: exporting your mix
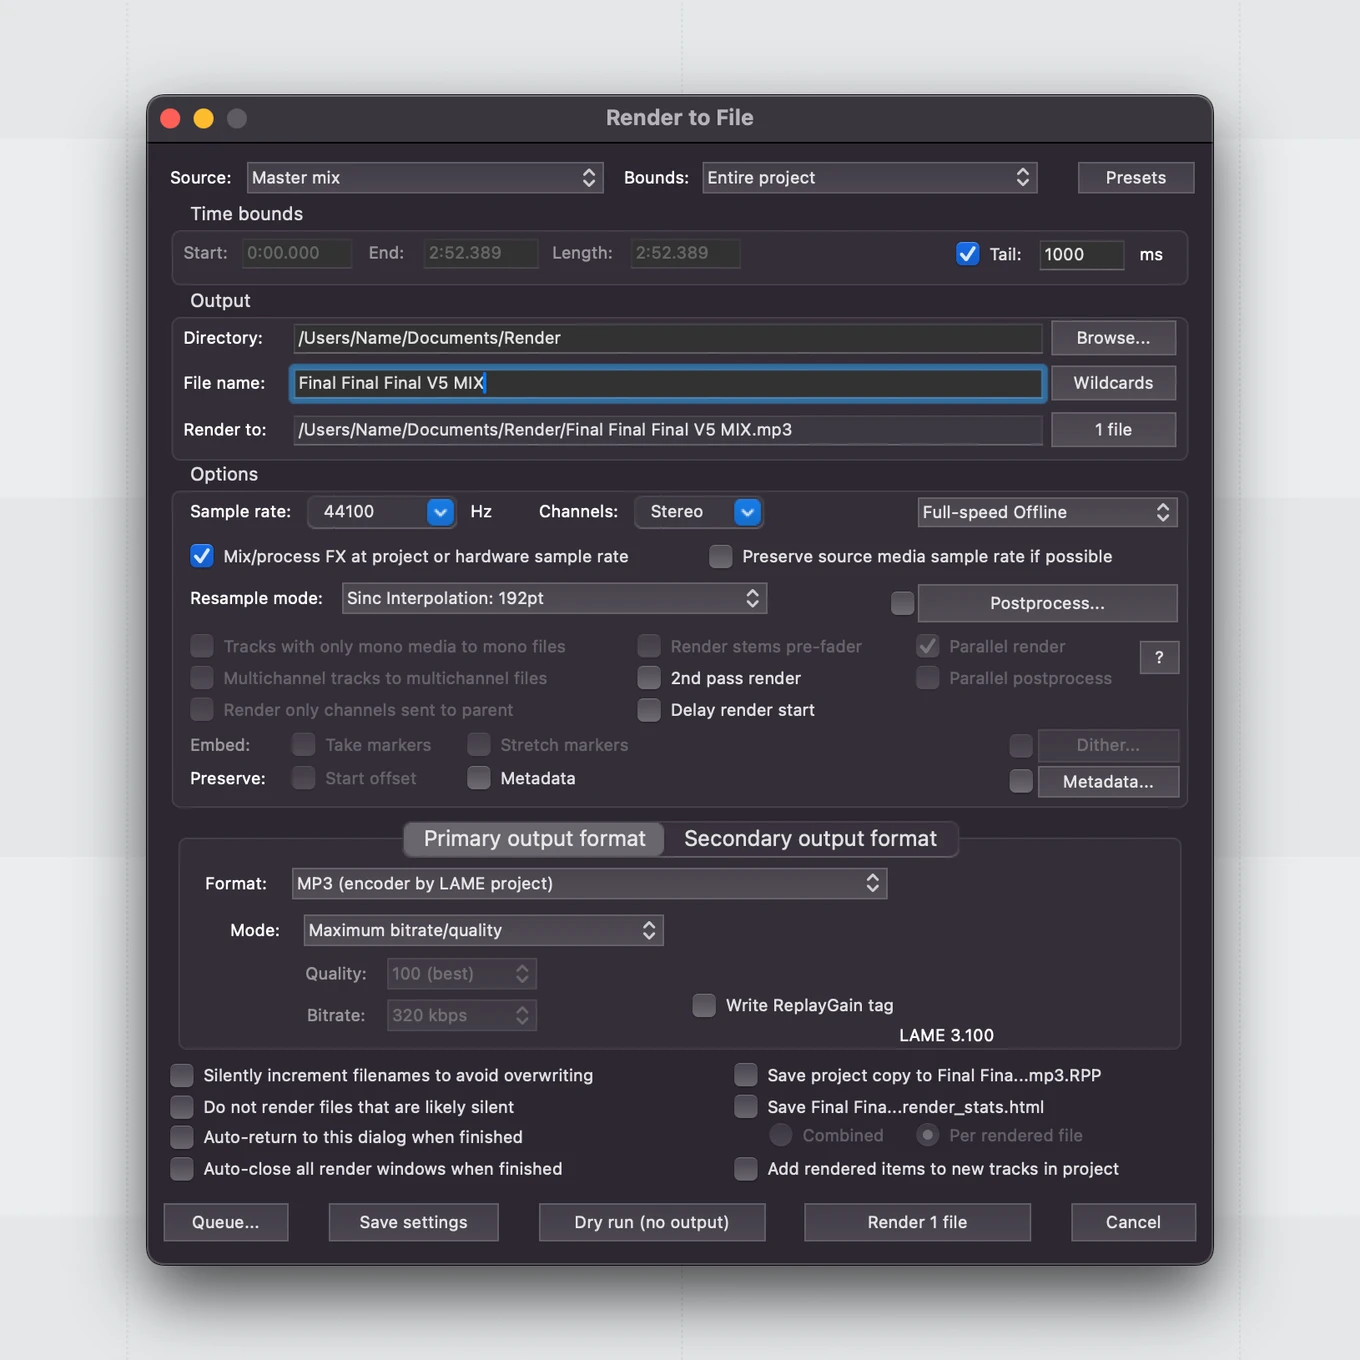
If you just want to export what you have in the timeline as a single stereo file, here's all you need to do:
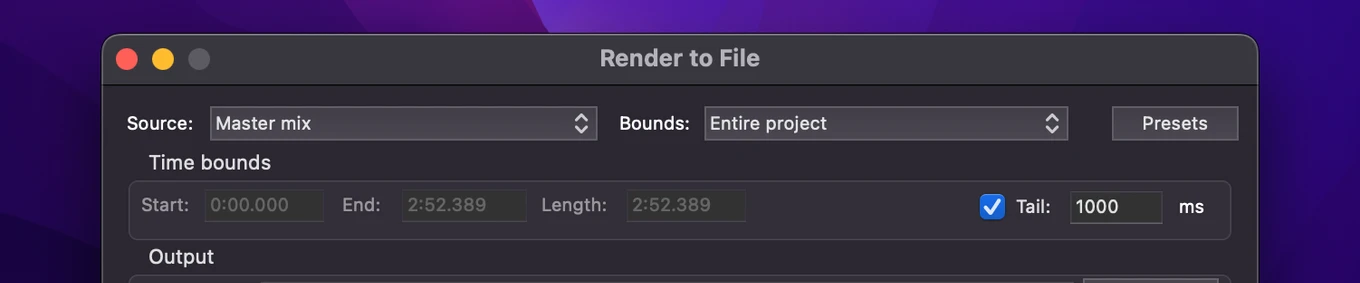
- Set Source to Master mix
- Set Bounds to Entire project if you want to export the whole project, or Time selection if you prefer to export just a section
- Under Output, click Browse to choose where to save the file
- Give it a name in the File name field
- Under Primary output format, choose your format. Use WAV for maximum quality or MP3 for a smaller file size (more on that below)
- Click Render 1 file
That's it. REAPER renders your project and saves the file to the folder you chose.
📁 Source and Bounds
These two settings control what gets exported.
Source lets you choose what REAPER renders:
- Master mix — the full mix as it sounds through your master track. This is what you want for a final export.
- Selected tracks (stems) — renders each selected track as its own separate file. Note that this does not pass through your master FX chain.
- Master mix + stems — exports the full mix and all selected individual tracks at the same time.
- Selected tracks via master — similar to stems, but each track will pass through your master track's FX chain.
- Region render matrix — renders multiple regions as separate files. Useful for exporting multiple versions at once. Click Region Matrix... to see all your regions and choose which ones to export, with the option to select different tracks per region.
- Region render matrix via master — same as above, but individual track exports will go through the master track FX chain.
- Selected media items — renders only the media items you have selected in the timeline.
- Selected media items via master — same as above but passes through the master FX chain.
- Razor edit areas — renders only the areas defined by your razor edits.
- Razor edit areas via master — same as above but through the master FX chain.
- Razor edit areas as one file — combines all razor edit areas into a single continuous file.
Bounds controls the time range:
- Entire project — renders from the start to the end of all your content.
- Time selection — renders only what you have selected in the timeline. Useful for exporting a specific section.
- Custom time range — lets you type in exact start and end times.
- All project regions — renders each region as a separate file.
- Selected regions — renders only the regions you have selected. You can select them by clicking on them in the timeline (they'll light up slightly when active) and use Shift or Ctrl + click to select multiple.
- All project markers — renders a file for each marker in the project.
- Selected markers — same idea as selected regions, but for markers.
🏭 Options
Most of the options in this section you won't need to touch for a standard export, but a couple are worth knowing!
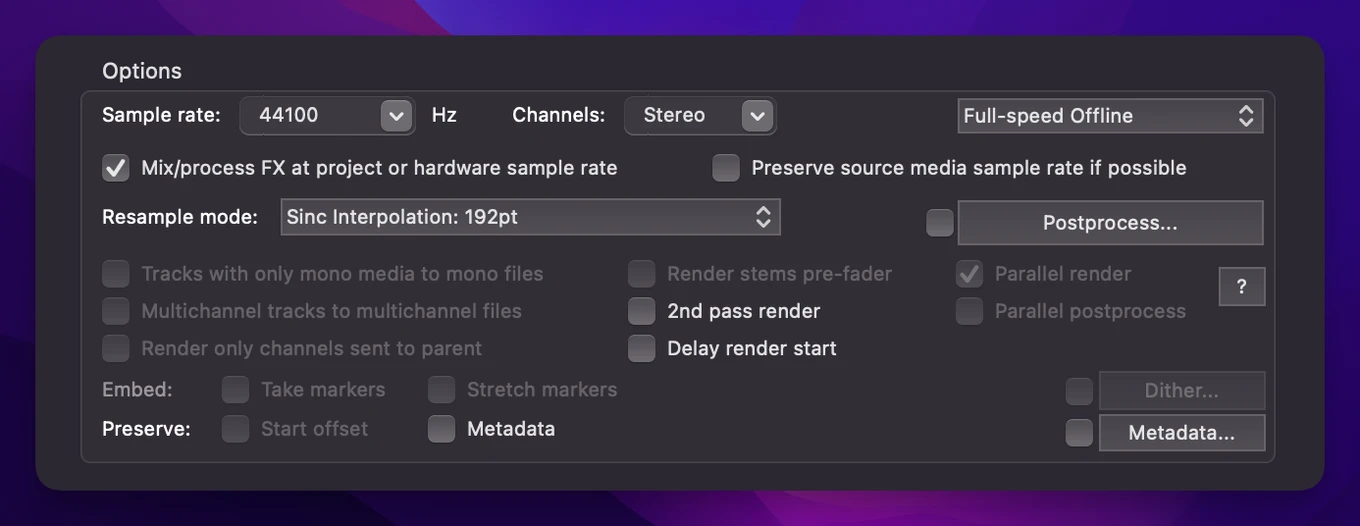
- Sample rate — stick with whatever your project is set to. Usually 44100 Hz for music and 48000 Hz for video or streaming.
- Channels — Stereo for a normal mix, or Mono if you need it.
When selecting sources like stems or selected media items, more options will appear here to further customize your export.
The Postprocess button is especially useful for sound designers. Click it to open a window where you can apply processing after the render, like normalizing, limiting, and adjusting fades.
The Metadata section is worth filling out if you're building sound effect libraries or doing a final master export. This is where you enter info like track title, artist, album, and other embedded tags.
🎵 Choosing your format
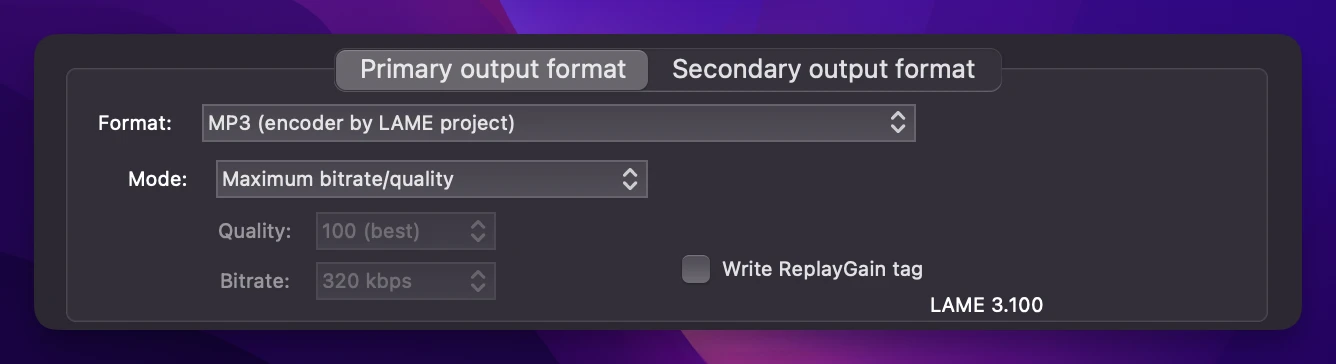
In the Primary output format section at the bottom of the dialog, you can choose your file format and settings.
WAV is the go-to for highest quality. If you're sending your mix to a mastering engineer or keeping an archive copy, use WAV at 24-bit PCM. It's uncompressed and lossless.
MP3 is great when you need a smaller file to share online or send via email. You can set the bitrate. 320 kbps is the highest quality, and 192 kbps is a solid middle ground if you really need to keep the file size down.
FLAC is lossless like WAV but with compression, so the file size is smaller. It's a good option when storage matters but you don't want to lose any quality. The main downside is that not all software and devices support it natively, so WAV is still the safer choice for sharing with others.
⚙️ A few more useful options
Tail — enabling this adds extra time at the end of the render so that reverbs and delays don't get cut off. By default it's set to 1000ms (1 second), which is usually enough, but you can increase it if you have longer reverb tails.
2nd pass render — renders the project twice, which ensures that any effects with a long pre-delay (like certain reverbs or lookahead limiters) have enough time to fully process. Check out the article on seamless loops for a deeper dive on this!
Dry run (no output) — renders the project without actually saving a file. Useful for checking your levels before committing to the export. You'll see the render dialog play through as normal, and you can catch any clipping or issues before they end up in your file.
Render queue — instead of rendering immediately, you can add jobs to a queue with Queue... and run them all at once. Great if you need to export multiple versions of a project in different formats.
Silently increment filenames — if a file with the same name already exists, REAPER will add a number to the end instead of asking you or overwriting. Handy if you render often and don't want to manage filenames manually.
That covers the essentials and then some. Once you get comfortable with the Render dialog, it becomes one of the fastest parts of your workflow. 💙