One amazing REAPER feature is the ability to view and manage FX inserts inside your tracks like this 😍

This is a great time-saving feature, as you can see all of the FX slots for a track in one place and easily insert or remove effects as needed.
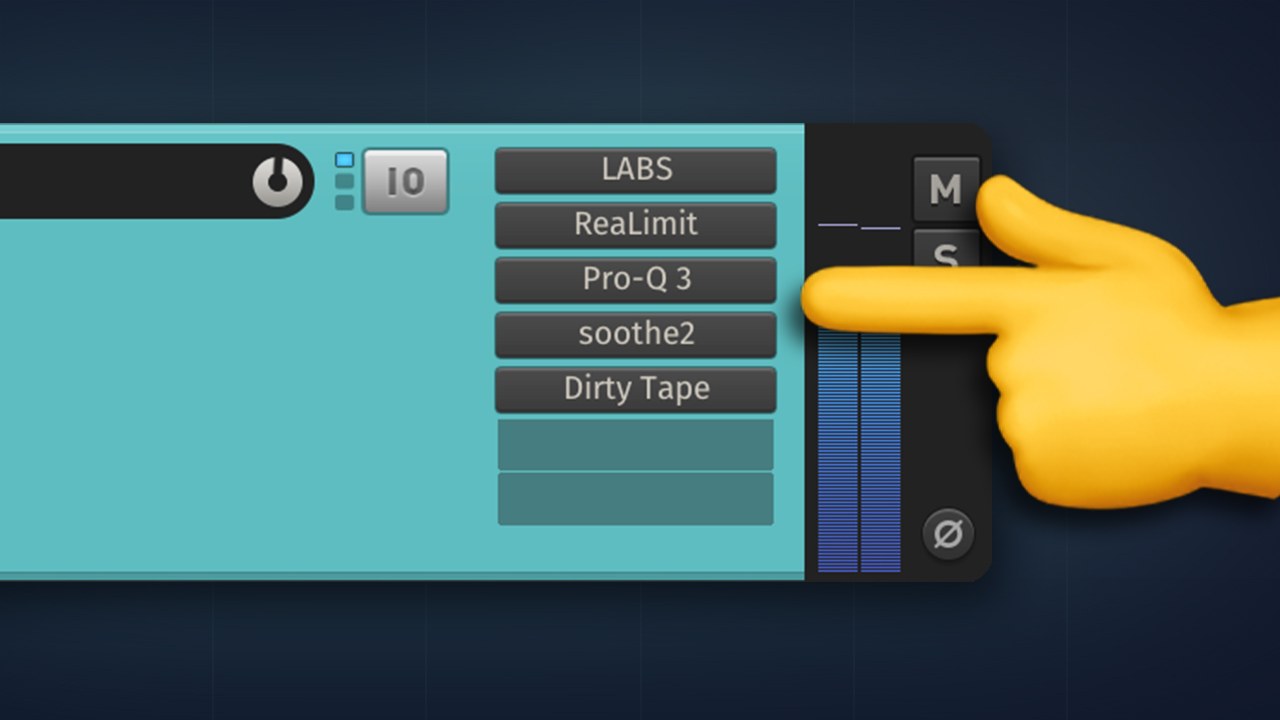
In this tutorial I will show you how to enable this feature + a little hack to show it on the right side like this 👌

By the way, this feature as well as the hack I am about to show you, should work with any REAPER 6 based theme 💪
Check out how nice and responsive it is! 🤩

How to enable FX inserts on TCP
To access this feature, simply right click anywhere in an empty field of the TCP and select “Show FX inserts in TCP (when size permits)”

This will display FX inserts at the bottom of the track controls. To view them on the right side, we can do some minor theme modifications, which I will demonstrate next.
How to place TCP FX inserts on the left/right side
User FeedTheCat discovered a way to modify any REAPER 6-based theme to display the FX list on either the left or right side. He provided an excellent guide detailing the steps here. His contributions are remarkable, and I encourage you to support him if you can💙
📹 I made a video going through each step in case want to follow along:
Unzipping the theme
- In REAPER, go to Options > Show REAPER Resource Path.
- Go to “ColorThemes” folder and find the theme you wanna tweak.
In this case we will tweak the default theme: Default_6.0.ReaperThemeZip - To unpack this theme, rename the file’s extension and place a dot before the zip like this: “.ReaperTheme.Zip” and unzip it.

You should end up with two files that look like this:

Modifying the theme
Find a file called “rtconfig.txt” and open it with a text editor.

Mod part 1:
Find the line of code that says "macro calcTcpSecs scale" (default: line 203).
A few lines below that there should be a line that starts with "set main_sec ......" (default: line 221).
Insert a few empty lines below that (to make space) and then paste the following code snippet:
;**FTC MOD (part 1): FX-list on the right side**

	; Length of FX-list section (default: 100)
	set fxparm_sec 100

	; Maximum number of columns when not enough space (default: 2)
	set fxparm_num_columns 2

	; FX height
	set fx_height 16 (default: 16)

	; Right margin (default: 7)
	set fxparm_margin_r 7

	set fxparm_sec * . scale
	set fx_height * . scale
	set fxparm_margin_r * . scale
	set main_sec - . fxparm_sec@w

	;** END of mod**Copy
In this snippet of code there's a few easy to change settings about the FX-list.
I'd recommend you first leave this as is, and come back to it later if you want to try and adjust a few things.
For example changing the line "set fxparm_sec 100" to "set fxparm_sec 200" will double the length of the FX-list.
Mod part 2:
Find the line that says "macro drawTcp scale" (default: 289).
A few (~100) lines below that there should be a line that says "endMacro" (default: line 373).
Insert a few empty lines above that (to make space) and then paste the following code snippet:
;**FTC MOD (part 2): FX-list on the right side**

	set fxparm_x  - tcp.size{0} fxparm_sec{0}
	set fxparm_y - tcp_padding{1} scale
	set fxparm_w - fxparm_sec{0} fxparm_margin_r{0}
	set fxparm_h - h * 2 fxparm_y{0}

	set tcp.fxparm [fxparm_x{0} fxparm_y{0} fxparm_w{0} fxparm_h{0} 1 0 1 0]
	set tcp.fxparm ?meterRight{0} - tcp.fxparm  [meter_sec{2}]
	set tcp.fxparm mainCollapse{0}==1 [0] supercollapsed{0}==1 [0]

	set fxparm_min_w - / fxparm_w{0} fxparm_num_columns fxparm_margin_r
	set tcp.fxparm.font scale{0}==1.0 [01 fx_height{0} fxparm_min_w{0} fxparm_w{0} -1]
	set tcp.fxparm.font	scale{0}==1.5 [06 fx_height{0} fxparm_min_w{0} fxparm_w{0} -4]
	set tcp.fxparm.font	scale{0}==2.0 [11 fx_height{0} fxparm_min_w{0} fxparm_w{0} -6]

	set tcp.fxparm.margin   + [0 0 0 0 0 0 0.5] * scale [3 0 3]

        set tcp.fxembed - + + + [main_sec main_sec_last{0}] [tcp_padding] hideValues{0}==1 [0] + [0 values_sec{3}] [0 tcp_padding] \
		+ - - [0 0 main_sec] [0 0 tcp_padding{0}] [0 0 tcp_padding{0}] \
		- - - [0 0 0 main_sec] [0 0 0 main_sec_last{0}] [0 0 0 tcp_padding{1}] hideValues{0}==1 [0] + [0 0 0 values_sec] [0 0 0 tcp_padding{1}] \
		?labelFlip{0} [0 0 element_h{0}] [0]

	set tcp.fxembed	+ . * scale [-4 2 2 -1]

	;** END of mod**Copy
Save your tweaked rtconfig.txt file and now let’s put the theme back together.
Repacking the theme
Lastly, we will zip back the two files we just unzipped. And name it with the extension “.ReaperThemeZip”

This is now your new modified theme! 🤩👇

It’s functional but it looks weird
Unfortunately there isn't a generic solution to this. You'll need to customize the appearance by editing the PNG images.
The images are in the unpacked folder from step 1 and are the following: tcp_fxparm_norm.png, tcp_fxparm_empty.png, tcp_fxparm_byp.png.
If you use theme Smooth 6, I uploaded the images I used to replace here.
(Or you can just download the modded Smooth 6 theme directly here)
That’s it!
Ever since I added this mod to my Smooth 6 theme, my workflow has improved drastically! I find it much more enjoyable to mix directly from the arrange view, without having to open the mixer. 😍
By the way, now that you know how to mod themes, I also suggest checking this out: How to fully collapse folders in REAPER↗️
ㅤ